
How to Paint Wood Without Sanding: The Honest Limits
This post contains affiliate links. As an Amazon Associate, we earn from qualifying purchases.
To paint wood without sanding, clean the surface, remove wax and loose flaking paint, and use a bonding primer or a chalk-style paint that grips a sound existing finish. Skip sanding only when the old coating is stuck tight; Rust-Oleum’s own Chalked data sheet still calls for light sanding on glossy or porous surfaces.
That “stuck tight” clause carries more weight than the rest of the how to paint wood without sanding sentence put together. A finish that holds against a fingernail will carry new paint for years. One that lifts in sheets takes the new coat down with it, and the failure shows up at the edges first, where hands and hips land.
What follows is the real prep order, the two product families that do the gripping, the temperature and moisture numbers that decide whether your room is even in range, and the specific conditions where no-sand advice quietly stops applying.
Key Takeaways
- Sound paint can stay; failing paint cannot. Deep continuous cracks or blistering that exposes bare wood means full removal, no exceptions.
- Wipe with the solvent your own product’s sheet names. Chalked says mineral spirits; XIM 400C NT explicitly forbids it.
- Stay between 50 and 90°F with humidity under 85%. Outside that window the published dry times stop meaning anything.
- Wait 2 hours before you distress chalk paint. Sanding at 90 minutes pulls up gummy rolls instead of dust.
- Lead dust is the real reason to think hard about sanding. A NIOSH respirator, a HEPA vacuum, and a wet mop are the minimum, not the upgrade.
What the No-Sand Promise Actually Covers
Two different products get sold under the same no-sand banner, and they don’t promise the same thing. A chalk-style paint grips by bonding to a sound film already on the wood. A bonding primer grips by chemical adhesion, then accepts whatever topcoat you lay over it. Confusing which one you bought is where a lot of peeling stories begin.
Rust-Oleum Chalked Ultra Matte Paint is specified for interior use on wood, metal, ceramic, glass and canvas. Its data sheet lists one-coat coverage on most surfaces without special preparation or priming, then separately directs that glossy or porous surfaces be lightly sanded to enhance adhesion, and that wax be removed with mineral spirits.
Read the Rust-Oleum Chalked technical data sheet closely and the tension is on one page. The headline says no special preparation. Four lines later it says to wash with soap and water, wire-brush loose paint and rust, sand glossy or porous surfaces, and wipe off wax. That’s not a contradiction so much as a marketing headline sitting above a real prep list.
The numbers on that same how to paint wood without sanding sheet are worth knowing before you buy: 110 to 150 square feet per quart at the recommended film thickness, a VOC content under 75 g/l, and a 3-year shelf life. It’s an acrylic, so it cleans up with water, and it’s interior only. Don’t plan on it for a porch rail.
| Product | Sanding stance | Best on |
|---|---|---|
| Rust-Oleum Chalked (CHD-01) | None required; light sand on glossy or porous | Interior furniture and decor |
| XIM 400C NT (XIM-18) | None for most clean surfaces; dull hard gloss | Problem surfaces, stain blocking |
| Painter’s Touch 2X Ultra Cover | Scarify smooth, hard, glossy finishes first | Wood, metal, most plastic |
If you’re still deciding what to put in the can, the roundup of the best paint for wood furniture without sanding covers the same trade-offs in more depth, and there’s a shorter list of best furniture paint options if you just want names.
XIM 400C NT is the other half of the picture, and it’s the one I reach for on a surface that’s fighting back. It’s a solvent-based bonder that handles stain blocking and hard-to-coat surfaces that chalk paint would just slide off. It handles stain blocking and hard-to-coat surfaces that chalk paint would just slide off. It is not, however, for tubs, sinks, or showers, because continuous water contact defeats it.
The Fingernail Test That Decides Everything
A fingernail settles this faster than any product label.
Chemical stripper, scraper, the whole miserable production. The second one I did, I scraped the loose bits, scuffed it lightly, primed, and was painting before lunch. Two dressers, same condition, wildly different amounts of my life spent.
The test itself takes ten seconds. Press a fingernail into the edge of the old finish and try to lift it. If the paint won’t budge and it isn’t peeling in sheets anywhere, that coating is sound. Sand it lightly, prime it, and move on. If a whole section comes up like a scab, you’re not painting over that, you’re removing it.
If a fingernail can lift the edge and the paint isn’t peeling in sheets, it’s sound. Sand it, prime it, move on. If it comes up in flakes, stop reading paint labels and go find a scraper.
Glossy factory finishes are the other wrinkle here. Rust-Oleum’s Painter’s Touch 2X Ultra Cover sheet says smooth, hard, or glossy finishes should be scarified by sanding to create a surface profile. XIM says the same thing in different words for very hard glossy surfaces, and prescribes carbide sandpaper for the job. Two manufacturers, one conclusion. The painting over glossy paint problem is really a tooth problem.
How to Paint Wood Without Sanding: The Prep Sequence
Four steps, in this order: wash, scrape, wipe, prime.
I learned the hard way that skipping the wash is expensive. Before long the drawer edges were peeling off in sheets, right where hands and knees had been hitting it. Now I wipe with a degreaser, scuff the surface lightly, and wipe again. Boring step. It’s the whole difference.
Before you start: Old paint from before 1978 may contain lead, and sanding or scraping releases it as dust. Wear a NIOSH-approved respirator, clean up with a HEPA vacuum and a wet mop, and call the National Lead Information Hotline at 1-800-424-LEAD before you touch a painted surface you haven’t tested. Lead dust causes serious illness, especially in children, and pregnant women should avoid exposure entirely.
- Wash with soap and water, then let it dry completely. Rust-Oleum’s chalk sheet says soap and water; XIM says a strong abrasive detergent, then rinse. Skip it and the paint bonds to a film of kitchen grease, not to wood, and it releases in patches.
- Scrape loose paint and rust with a wire brush or sandpaper. Leave a flaking edge in place and the new coat curls back from it within a season, because the loose layer keeps moving under a rigid film.
- Wipe with the solvent your product names. Mineral spirits for Chalked. Xylene or XIM GON for XIM 400C NT, and no mineral spirits at all. The wrong wipe leaves an oily residue and the bonder can’t grab.
- Scuff the glossy and high-traffic areas only. A light scuff on drawer fronts and edges is not the same job as sanding a whole dresser. It’s the difference between a finish that holds and one that peels.
- Prime or go straight to paint. A bonding primer buys you adhesion on the hard cases. Chalk paint is the shortcut when the surface is already sound.
If the piece is kitchen cabinetry rather than a dresser, the sequence shifts a little because of grease and hardware, and the painting cabinets without sanding walkthrough covers that version. For the furniture version end to end, there’s a longer treatment of painting furniture without sanding worth reading before you open a can.
The primer choice matters more than the paint choice, honestly. A bonding primer does the load-bearing work on anything glossy, stained, or previously coated with something unknown. Zinsser BIN Shellac Primer is the one I reach for when there’s bleed-through to block, and it seals odor along with the stain.
If you’d rather skip the primer entirely, a deglosser is the other route, and it’s a chemical scuff rather than an abrasive one. It works. It also smells like a chemistry lab and you still have to let it flash off completely.
What Temperature and Humidity Do You Actually Need?
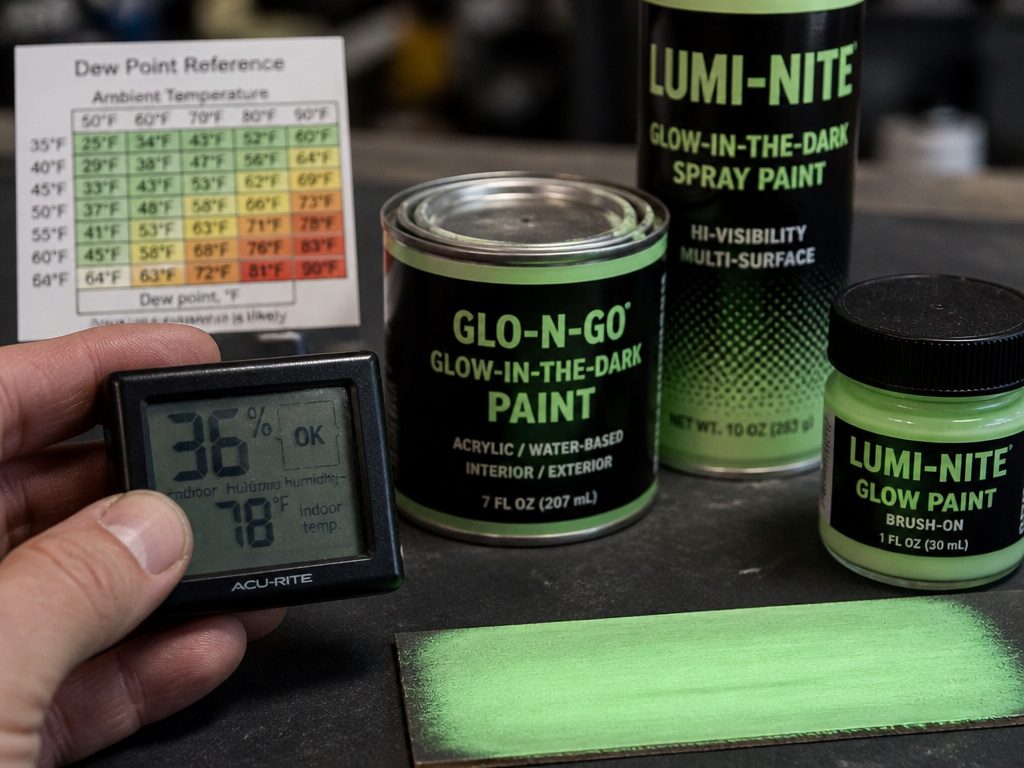
Fifty to ninety degrees Fahrenheit, with relative humidity below 85%. That’s the window both modern technical sheets publish, and outside it the dry times they list stop applying.
The interesting part is what the older guidance adds. The NBS Letter Circular 810, published by the National Bureau of Standards in November 1945, sets the same 50°F floor and allows 40°F only for urgent cases. Then it adds a rule the modern sheets dropped entirely: don’t paint if the temperature is expected to drop about 10°F, or well below 50°F. Ideal conditions, per that document, are around 75°F in bright sun.
That forecast rule is worth keeping. Paint that skins over at 60°F and then sits through a 45°F night cures unevenly, and uneven cure is where adhesion fails.
| Condition | What the sources say | What happens if you ignore it |
|---|---|---|
| Below 50°F | NBS: no painting; 40°F urgent only | Film skins but never bonds |
| Dropping ~10°F overnight | NBS: do not paint | Uneven cure, early peeling |
| Humidity above 85% | Both modern sheets: out of range | Blush, soft film, long tack |
| Green or wet lumber | NBS: 1 week dry sunny weather first | Blistering from trapped moisture |
| Continuous water contact | XIM: not for tubs, sinks, showers | Film lifts at the seams |
Blisters showed up before long. Now I wait until the wood is thoroughly dry after washing and tape a square of plastic wrap on the wood overnight. If there’s fog under that plastic in the morning, I’m not painting. A cheap pin moisture meter is the other check I use before the can even opens.
Water behind the paint film is the most common cause of blistering, and that finding is decades old and still the mechanism behind every no-sand chalk job that peels off damp furniture.
The Rag Question: Mineral Spirits or Xylene
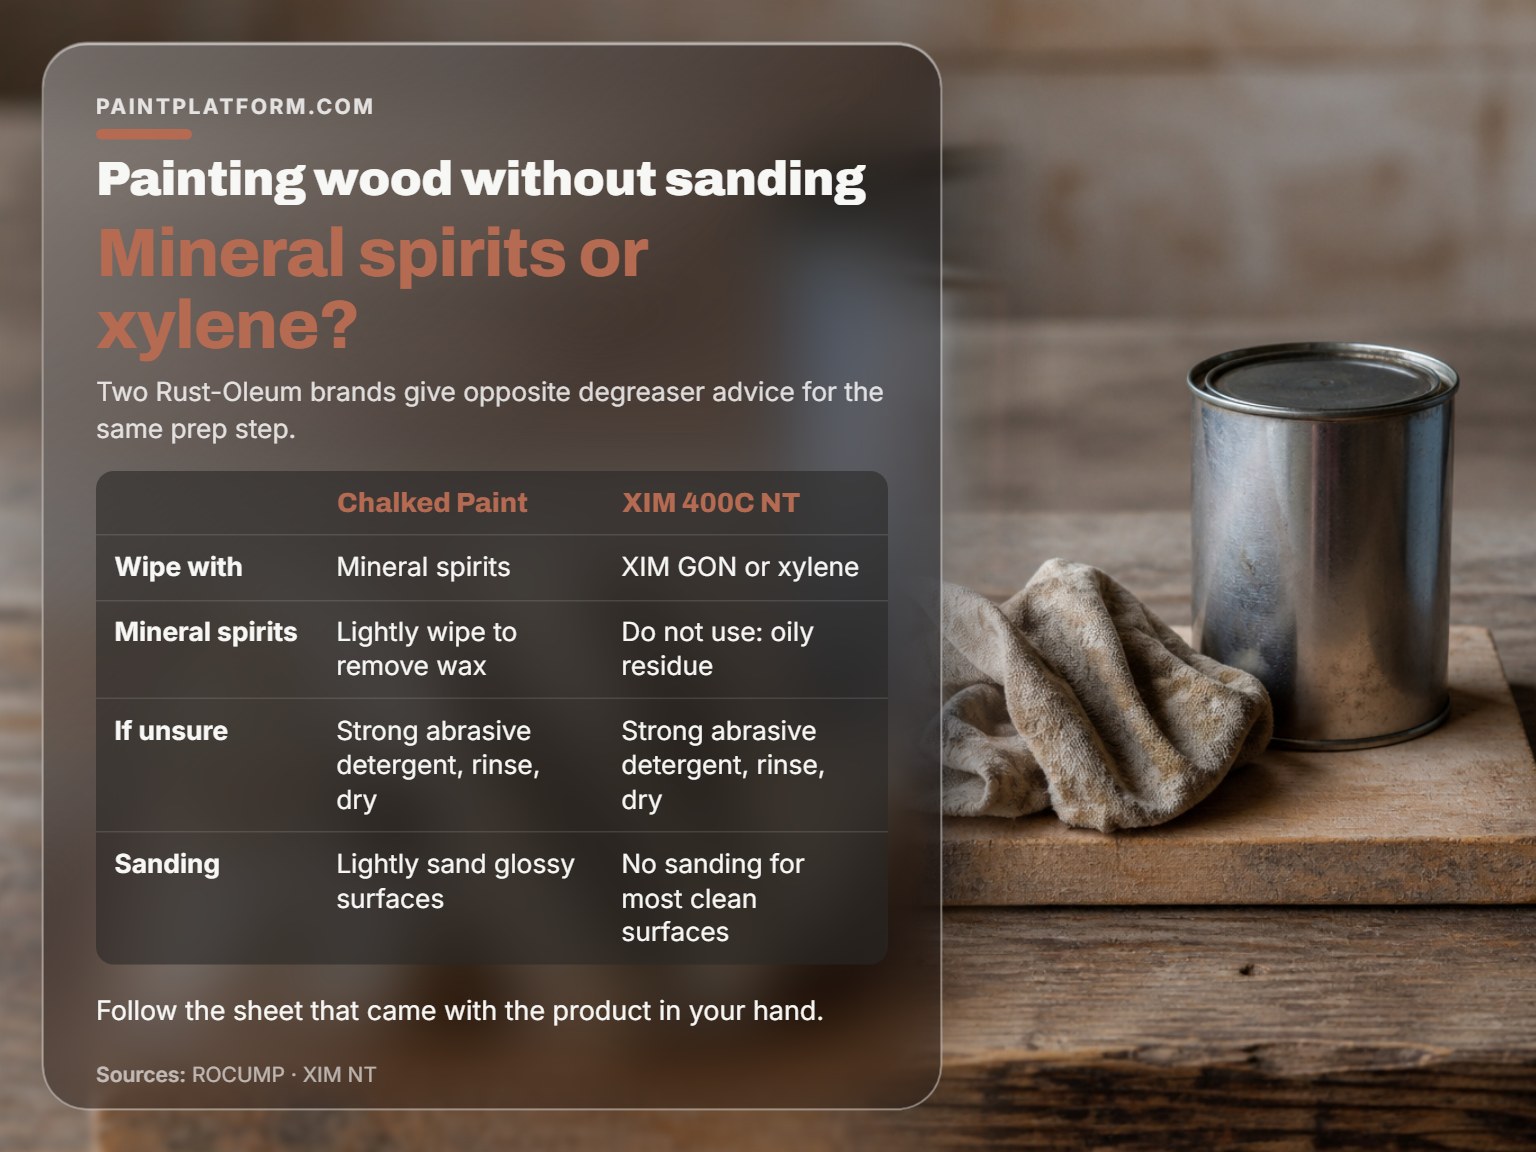
Mineral spirits and xylene sit on opposite sides of the same prep step, and both instructions come from the same parent company.
Rust-Oleum’s Chalked sheet says to remove wax by lightly wiping the surface with mineral spirits. XIM’s sheet says to wipe with XIM GON solvent cleaner or xylene, and adds, in plain language, do not use solvents that leave an oily residue such as mineral spirits or turpentine. Those are two Rust-Oleum brands giving opposite degreaser advice for the same operation.
The resolution is boring and correct: follow the sheet that came with the product in your hand.
- Chalk paint going on interior furniture? Mineral spirits on a rag to lift wax, then let it flash off.
- Solvent bonder going on a problem surface? Xylene or XIM GON. Mineral spirits will leave residue and weaken the bond.
- Not sure what’s on the wood? Wash with a strong abrasive detergent, rinse, and dry thoroughly. That step is safe under both sheets.
Cross-contaminating them is how you get a bonder that won’t bond and spend an evening wondering why.
Where No-Sand Advice Stops Working
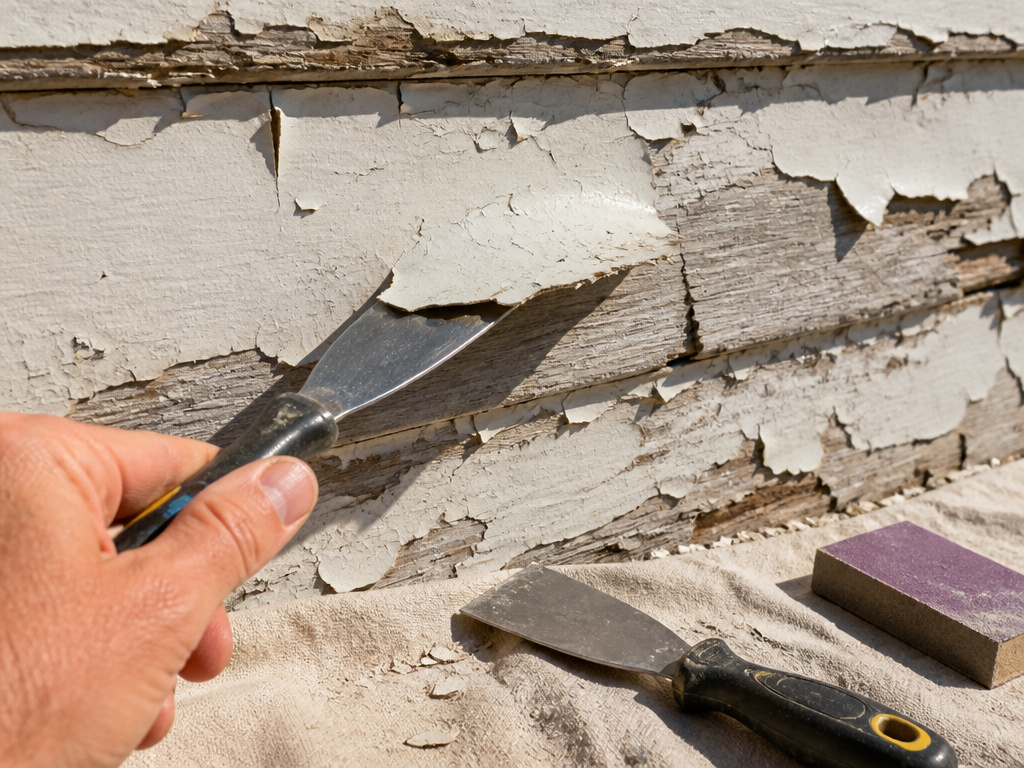
The no-sand method has a hard stop, and it’s written into federal preservation guidance rather than a paint can.
The NPS Preservation Brief 10 sets the threshold. If exterior wood shows continuous patterns of deep cracks, or is extensively blistering and peeling so that bare wood is visible, the old paint must be totally removed before repainting. That’s not a suggestion to scuff harder. It’s a full stop on the entire premise.
There’s a useful nuance in the same document, though. For limited conditions like crazing, intercoat peeling, solvent blistering, and wrinkling, scraping and hand sanding should be the first methods tried, before anyone reaches for a mechanical sander. And bare wood should be primed within 48 hours, then repainted. All sanding goes with the grain.
Where this goes sideways: Painting over a coating that’s already releasing. The new film looks perfect for a month, then comes off in the same sheets as the layer beneath it, because it was never bonded to wood in the first place.
Other places the method runs out:
- Flexible seams and caulk. XIM’s sheet warns that priming flexible seams or caulks causes cracking and loss of adhesion. Tape them off.
- Tubs, sinks, and showers. Continuous water contact is explicitly excluded from XIM 400C NT.
- Damp or green lumber. A week of dry sunny weather minimum, per the 1945 guidance.
- Polyethylene plastics. Painter’s Touch 2X calls out plastic storage containers as a surface that may hinder adhesion and says to test in a hidden area first.
- Extremely porous or badly stained wood. XIM recommends a second coat of the white version before the finish coat.
Drying, Recoat, and Distressing Without Wrecking It
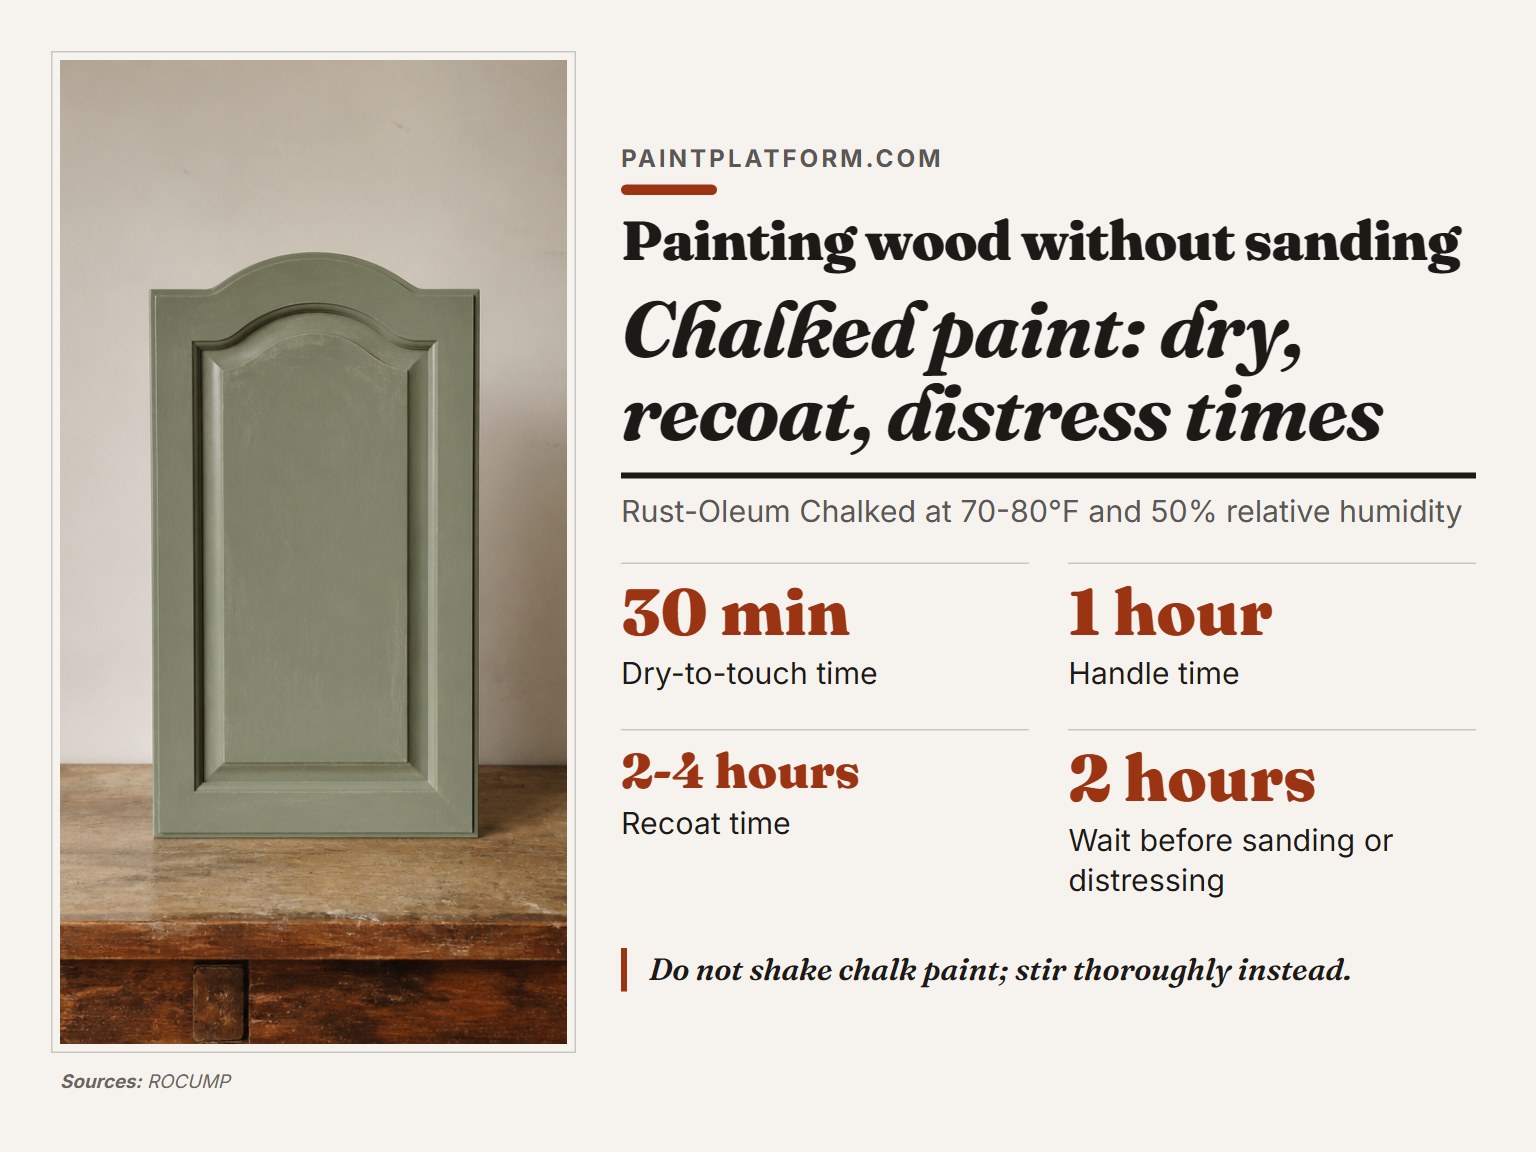
Thirty minutes to touch, one hour to handle, two to four hours to recoat. Those are the Chalked numbers at 70 to 80°F and 50% relative humidity, and they’re tighter than most people expect from a paint that looks like mud going on.
Chalked goes on looking streaky and half-finished while it’s wet, then flattens into that dusty matte as it sets. Don’t panic at the first pass. Two thin coats beat one thick one.
Wait the full 2 hours before you sand or distress. Sand too soon and you’ll pull up gummy rolls of paint instead of fine dust, and the edges you were trying to soften go ragged. In hot, dry conditions you can thin with up to 2 ounces of fresh water per quart to stretch the dry time, but that’s a rescue move, not a routine one.
The applicator question is where manufacturer guidance and community practice split cleanly:
- Chalked’s sheet: roller application is not recommended. Synthetic brush only.
- XIM’s sheet: foam brushes and foam rollers are not recommended.
- Widespread furniture-painting practice: foam rollers for a smooth chalk finish.
Both of the two most common DIY tools are excluded by the primary sources, and the community keeps using one of them anyway. My read is that a foam roller on a large flat panel is fine if you tip it off with a brush while it’s wet. On a spindle or a molding, use the brush and stop arguing with it.
Painter’s Touch 2X has a stranger recoat rule than chalk paint: recoat within 1 hour or after 48 hours, with nothing in between. Miss the one-hour window and you’re waiting two days. On plastic, maximum adhesion and durability arrive at 5 to 7 days, so don’t judge a plastic job on day two.
Easy to miss: Stir chalk paint, never shake it. Shaking whips air into an acrylic that’s already thick, and those bubbles pop through the film as pinholes you’ll see under raking light.
If you want a self-priming option that skips the separate primer step, the self-priming paint comparison covers which ones actually deliver that and which ones just print it on the label.
Frequently Asked Questions
Can you really paint wood furniture without sanding at all?
Sometimes, yes. Rust-Oleum’s Chalked sheet claims one-coat coverage on most surfaces without special preparation or priming, and XIM 400C NT states no sanding is required for most clean, paintable surfaces. Both sheets then carve out exceptions for hard, glossy surfaces. So the honest answer is that you can skip sanding on sound, matte, clean wood, and you can’t skip it on a factory-gloss finish.
Does chalk paint need a primer underneath?
Not according to its own data sheet, which lists one-coat coverage without priming. A bonding primer still earns its place on stained wood, unknown previous coatings, or anything that’s been waxed. On bare, clean, sound wood, the primer is optional.
How long before I can move a painted dresser back into the room?
Handle time is 1 hour and recoat is 2 to 4 hours on Chalked. Full cure is also listed at 2 to 4 hours, but I still give furniture a full day before loading drawers, because hardware and knobs put point loads on a film that’s technically dry and not yet hard.
What happens if I paint over a glossy factory finish without scuffing?
The paint sits on top and releases at the edges first. Rust-Oleum’s Painter’s Touch 2X sheet says smooth, hard, or glossy finishes should be scarified by sanding to create a surface profile, and XIM says very hard glossy surfaces need dulling with carbide sandpaper. Both manufacturers agree on this one. Skip it and the finish fails at the contact points.
Can I use this method on exterior wood?
Only if the coating is sound. NPS Preservation Brief 10 requires total paint removal once deep cracking or blistering exposes bare wood, and it recommends priming bare wood within 48 hours. Chalked itself is interior use only, so exterior work needs a different topcoat entirely.
The Bottom Line
Here’s the threshold I’d give anyone: if a fingernail can lift the old finish, or the paint is peeling in sheets anywhere on the piece, stop. That’s the line between a no-sand project and a stripping project, and no product label moves it.
Everything above assumes a coating that’s still doing its job. Sound paint is a perfectly good substrate. Failing paint is a liability that you’ll be gluing to with a fresh topcoat.
One thing I’d push back on: the no-sand label oversells what’s happening. You’re not skipping prep, you’re swapping a sander for a rag and ten minutes of 180-grit on the edges that get touched. That swap is worth making. It just isn’t the same as doing nothing.
Start with the fingernail. Then wash the piece and let it dry overnight before you decide anything else.
