
How to Paint an Arch on a Wall: Step-by-Step
This post contains affiliate links. As an Amazon Associate, we earn from qualifying purchases.
To paint an arch on a wall, draw the curve with a string-and-pencil trammel, tape the straight bottom edges with a level, cut in the curve with an angled brush, and roll only the flat middle. Retailers and pros split on taping the curve itself, and the brush-first method wins on tight arcs.
Ace Hardware’s tutorial has you tape the curve and press it down with a damp cloth. Guiffre’s Painting Co., a Michigan contractor, says ordinary tape wrinkles on a tight arc and a steady hand beats masking. Both methods work, and both show how to paint an arch on a wall. Which one you pick depends on how tight your curve is and how much brush control you trust.
Here’s the whole job in order: drawing the arch, the tape-vs-freehand call, brush and roller technique, caulk and primer, and the drying timeline that actually matters.
Key Takeaways
- Sources split on taping the curve. Ace Hardware tapes the whole curve; Guiffre’s says ordinary tape wrinkles on tight arcs and a steady brush beats masking.
- Use a 2-inch angled brush (Ace) or 2 to 2.5-inch sash brush (Guiffre’s). The pros don’t agree on width, but they agree the brush does the curve work.
- Sources split on rolling the curve. Ace rolls the arch interior with a 3/8-inch nap roller; Guiffre’s says roll flat parts only and cut the curve by hand.
- Sources split on primer. Atdecor skips a separate primer step with paint+primer; Guiffre’s says prime bare or filled spots or they flash dull; Benjamin Moore says prime unfinished drywall and unpainted trim, though previously painted walls may not need it.
- Pull tape immediately after the final coat (Ace and Benjamin Moore agree), and at a 45-degree angle (Ace).
What You Need Before You Start
The how to paint an arch on a wall tool list is short. Two brushes, one roller, one roll of tape, a level, and a string.
A 2-inch synthetic angled brush handles the cut-in. A medium 3/8-inch nap roller fills the arch interior. Low-stick painter’s tape like Ace Clean Release holds standard walls; Frog Tape for Delicate Surfaces protects fresh paint, wallpaper, and finished hardwood. One quart of paint covers most single arches, so buy a little extra for touch-ups.
Here’s the full kit:
- A 2-inch synthetic angled brush (Ace) or a 2 to 2.5-inch angled sash brush (Guiffre’s) for cutting in the curve.
- A medium 3/8-inch nap roller for the flat middle of the arch.
- Painter’s tape. Ace Clean Release for standard walls, Frog Tape for Delicate Surfaces on fresh paint or wallpaper.
- A level for the straight bottom edges.
- A string and a pencil for the trammel.
- One quart of paint. Atdecor says one quart covers most single arches.
- A tack cloth for the final dust wipe (Atdecor).
Two things I’d add that no guide mentions: a flexible sanding sponge for the curve, and a small artist brush for touch-ups. Guiffre’s calls the sponge essential because a flat sanding block will flatten the arc. The artist brush fixes paint bleed. Atdecor’s trick is to paint over the bleed with the original wall color, let it dry, then repaint the arch.
How Do You Draw the Arch Shape?
Start with the string trick. It’s the same trammel method every guide uses, but the pencil angle decides whether you get a clean arc or a wobbly one.
Ace Hardware’s method: cut a piece of string, tie a pencil to one end, tape the other end to the wall at the arch’s center point, and hold the string taut as you sweep the arc. The angle you hold the pencil matters a great deal to the shape. Keep it consistent the whole time.
Before you start: A taut string under tension can snap back and catch your eye in a fraction of a second, so wear safety glasses and stand to the side of the arc. If you’re on a step ladder to reach the top of the arch, check the spreader bars are locked before you climb. Tape the bottom edges before you cut in, not after.
Here’s the sequence:
- Find the center point of the arch on the wall. Atdecor says most arches work well at 30 inches wide, so 15 inches each side of center.
- Set the curve height. On a 9-foot ceiling, Atdecor starts the curve around 6 feet up, following the two-thirds rule.
- Tie the string to the pencil and tape the other end to the center point. Hold the string taut.
- Sweep the arc with a consistent pencil angle. Ace warns that changing the angle mid-arc changes the shape.
- Tape the straight bottom edges with painter’s tape and a level.
The pencil angle warning is the one most guides skip. If you tilt the pencil halfway through, the arc gets wider on one side. Hold it the same way from start to finish.
Tape the Curve or Cut It Freehand?
Ace Hardware says tape the curve. Guiffre’s says don’t. They’re both right, and that’s the problem.
Ace’s method: tape the curve with low-stick painter’s tape, press it down with a damp cloth to prevent bleed, and cut in along the tape line with a 2-inch angled brush. Guiffre’s method: skip the tape on the curve entirely, because ordinary tape wrinkles on a tight arc and a steady hand with a clean, well-shaped brush is often a better route than masking.
| Approach | Best For | Risk |
|---|---|---|
| Tape the curve (Ace) | Wide, gentle arcs | Tape wrinkles on tight curves; bleed under the edge |
| Cut freehand (Guiffre’s) | Tight arcs, experienced hands | Wobbly line if brush control isn’t there |
| Hybrid: tape the bottom, freehand the curve | Most DIY arches | Requires a steady hand for the curve only |
Common mistake: Taping a tight curve with ordinary painter’s tape. The tape wrinkles, paint bleeds under the wrinkles, and you get a scalloped edge that’s harder to fix than a freehand line would have been.
My take: tape the straight bottom edges with a level, and freehand the curve with an angled sash brush roughly two to two-and-a-half inches wide. That’s the hybrid row in the table. It’s the lowest-risk path for a first arch, and it’s what I’d tell a beginner to do.
If you want more on getting crisp paint lines, the crisp paint lines technique applies to the straight bottom edges of an arch just as much as to a wall corner. And if you want to practice a tape-based design on a flat wall first, the geometric accent wall guide covers the tape-and-level approach before you take it to a curve.
Prep First: Caulk, Prime, and Sand the Curve
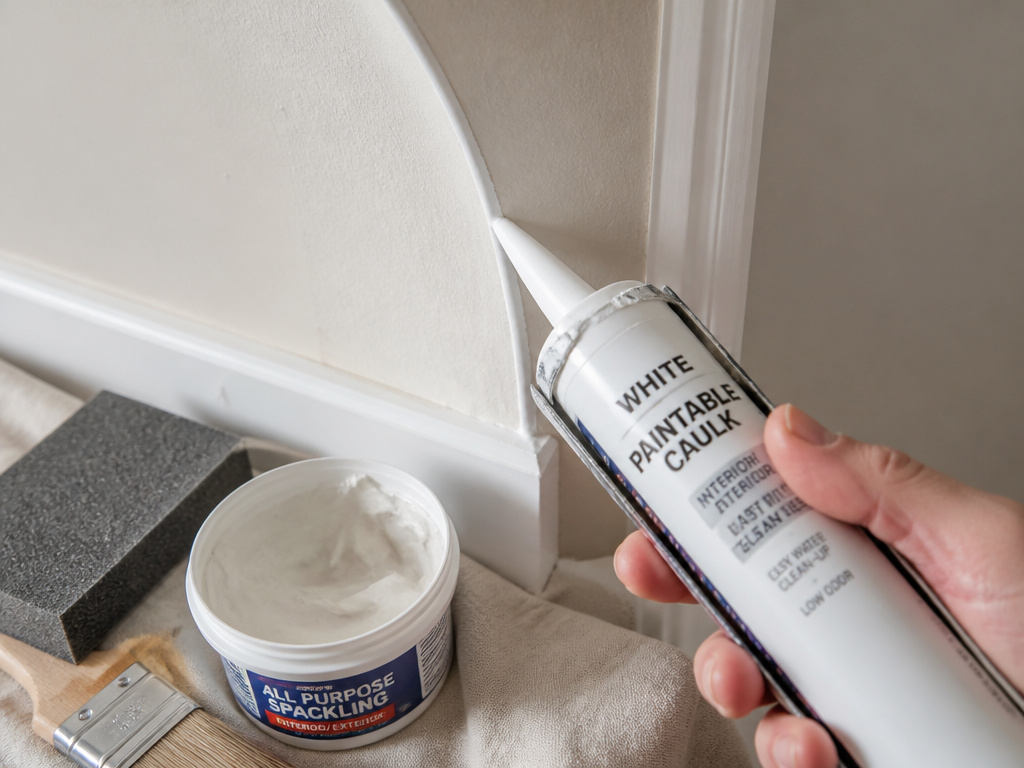
One unfilled hairline gap will read as a dark line on the finished wall. Guiffre’s says the joint between trim and curved plaster moves as the house expands and contracts with humidity and heat, so gaps come back if you skip the caulk.
The prep steps that matter:
- Tap the curved plaster with a knuckle. Guiffre’s says a hollow sound or a bulge means loose plaster that needs repair before painting.
- Fill and sand patches. Benjamin Moore says to repair cracks and small holes with spackling compound, then vacuum the sanding dust.
- Sand curves with a flexible sponge or folded abrasive. Guiffre’s warns that a flat sanding block will flatten the curve.
- Caulk the trim-to-curve joints with paintable caulk. Guiffre’s says silicone caulk repels paint and must not be used.
- Leave the outside edge of the return uncaulked. Guiffre’s says caulk there would blunt the crisp or rounded edge.
- Prime bare or filled spots. Guiffre’s says unprimed patches flash dull under the finish.
Where this goes sideways: Skipping primer on a spackled patch. The patch absorbs the topcoat differently than the surrounding wall, and it shows as a dull spot the moment the paint dries. Guiffre’s calls this flashing, and it’s the most common reason a freshly painted arch looks patched.
There’s a real disagreement on primer. Atdecor says to choose paint with primer built in and skip the separate primer step. Benjamin Moore says prime unfinished drywall and unpainted trim, but previously painted walls may not need it. Guiffre’s says prime bare or filled spots regardless. My read: if you’re painting over an existing wall color with no patches, Atdecor’s paint+primer approach is fine. If you filled anything, prime it. Guiffre’s is right on that one.
Cutting In: Brush Width, Bristle Dip, and Wet Edge
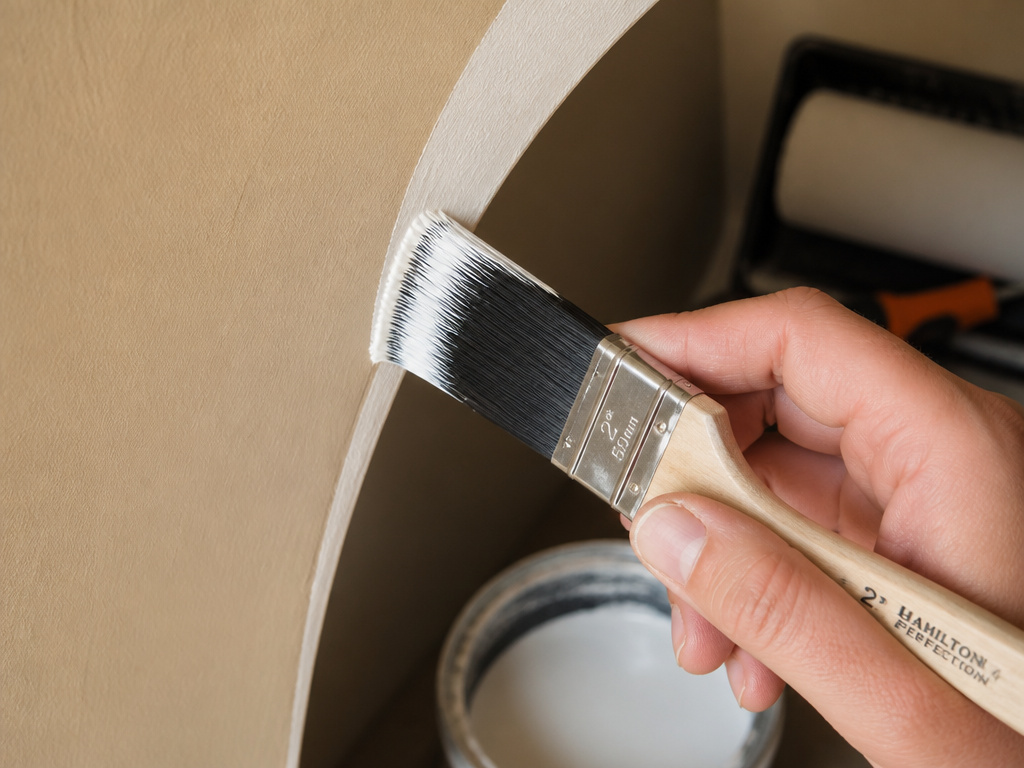
The brush does most of the how to paint an arch on a wall work. Width, bristle load, and wet edge decide whether the cut line reads clean or ragged.
Brush Width
Ace recommends a 2-inch synthetic angled brush. Guiffre’s recommends an angled sash brush roughly 2 to 2.5 inches wide. Either works. The 2.5-inch brush covers more ground per stroke; the 2-inch brush gives more control on a tight arc.
Bristle Dip
Guiffre’s says about a third of the bristle length. The arch painting technique report from Texas A&M’s AgriLife Extension says one-third to one-half. The difference matters less than consistency. Dip the same amount every time, or the paint load varies and the cut line thickness varies with it.
Wet Edge
Guiffre’s adds two rules that aren’t in the retail guides:
- Keep a wet edge. Cut in slowly with an angled sash brush and don’t let the edge dry before you roll into it.
- Finish-stroke into the painted area, not out to the unpainted area. This is the Texas A&M rule too, and it’s the difference between a sharp line and a feathered one.
I won’t freehand a curve with a narrow brush, no matter how good the brush is. The narrower the brush, the more strokes it takes, and every stroke is a chance to wobble. A 2-inch angled brush covers the arc in fewer passes and the line stays truer. Found that out the hard way on my first arch.
Rolling the Arch: Where Pros and Retailers Split
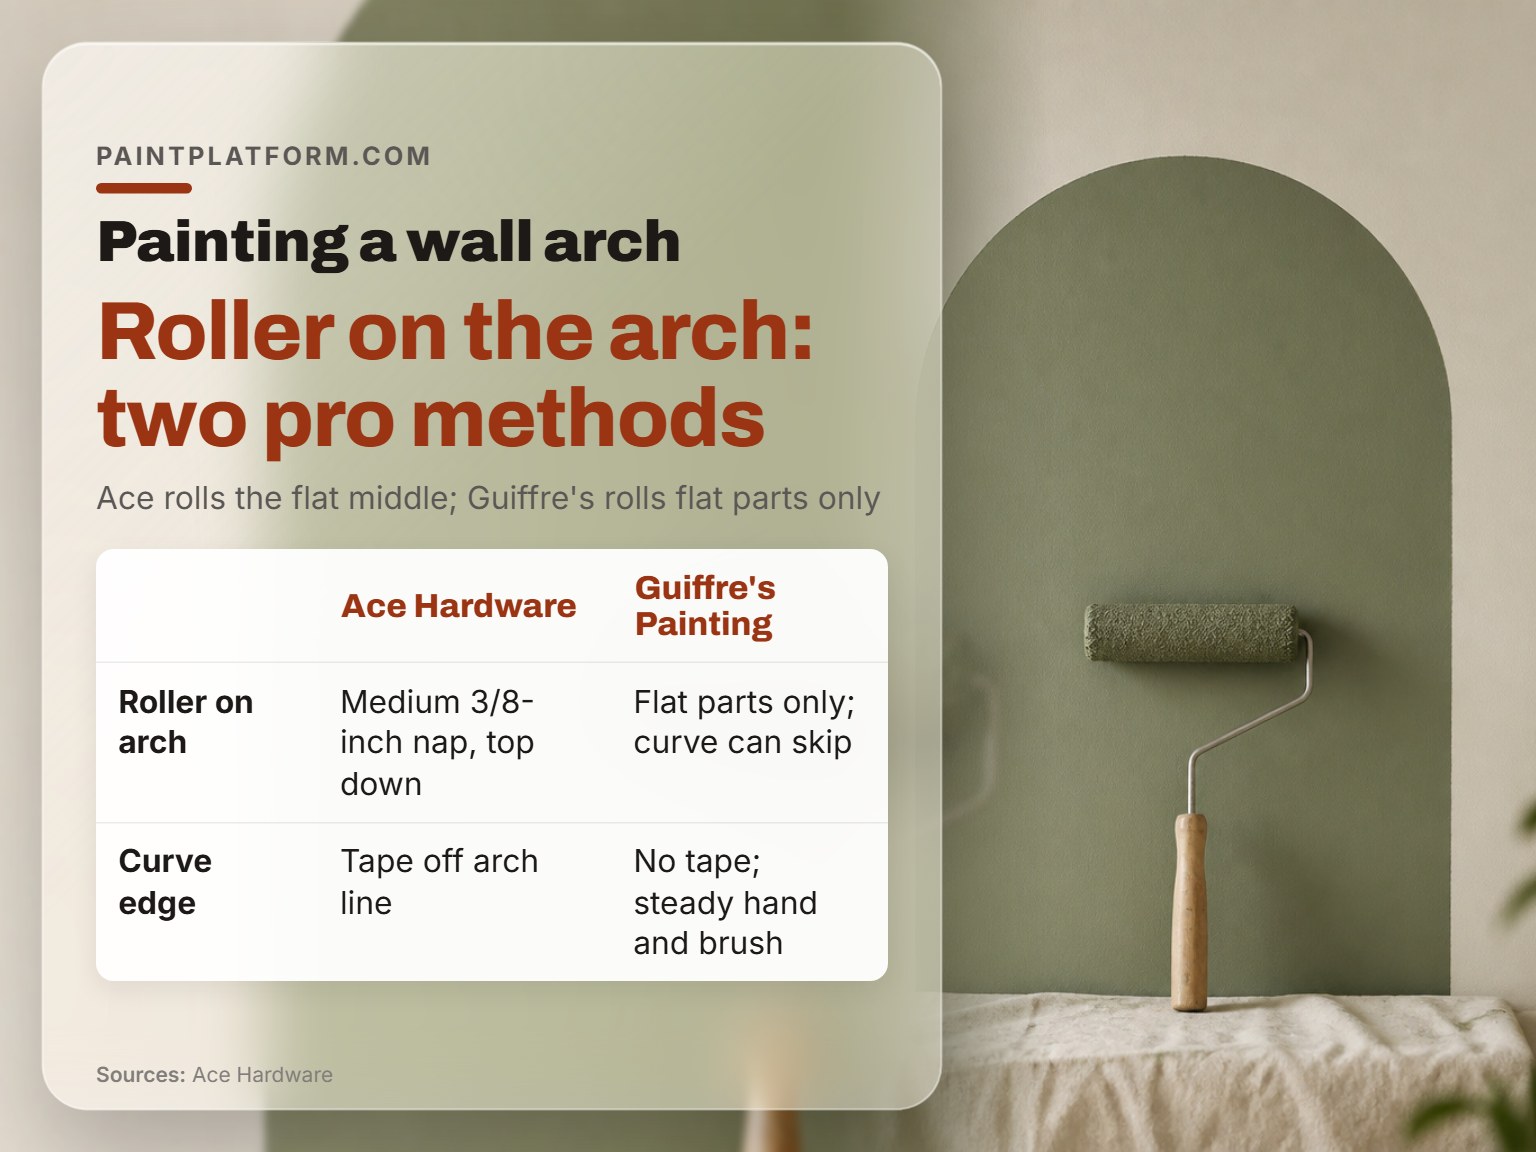
Roll the flat middle. That’s the one part of this job both camps agree on.
Ace says use a medium 3/8-inch nap roller and start at the top of the arch, working down. Guiffre’s says roll only the flat parts, because a roller on a tight curve can skip the edge, leave a stippled texture different from the nearby wall, or ride onto the trim.
The compromise: roll the flat middle of the arch, and blend the roller into the cut-in edge while both are still wet.
Three rules for the roller:
- Load light. A wet roller drips on a vertical surface, and drips on a freshly cut curve are the hardest thing to fix without re-cutting the line.
- Roll top to bottom. Ace’s method is to start at the top of the arch and work down.
- Blend while wet. Guiffre’s own FAQ says a careful painter cuts the curve with a brush and blends the roller into it while both are wet.
For more on the roller-and-brush combination, the roller and brush guide covers the same blend technique on flat walls.
How Long Does Painting an Arch Take?
Years into painting, I rushed a wall to finish before dinner and rolled the second coat over paint that wasn’t dry. The color flashed uneven and lifted in patches. I knew better. Now I set a timer for drying time, and I don’t care how small the wall is.
That’s the whole timing question in one story. The paint has to dry between coats, and the sources disagree on how long that takes.
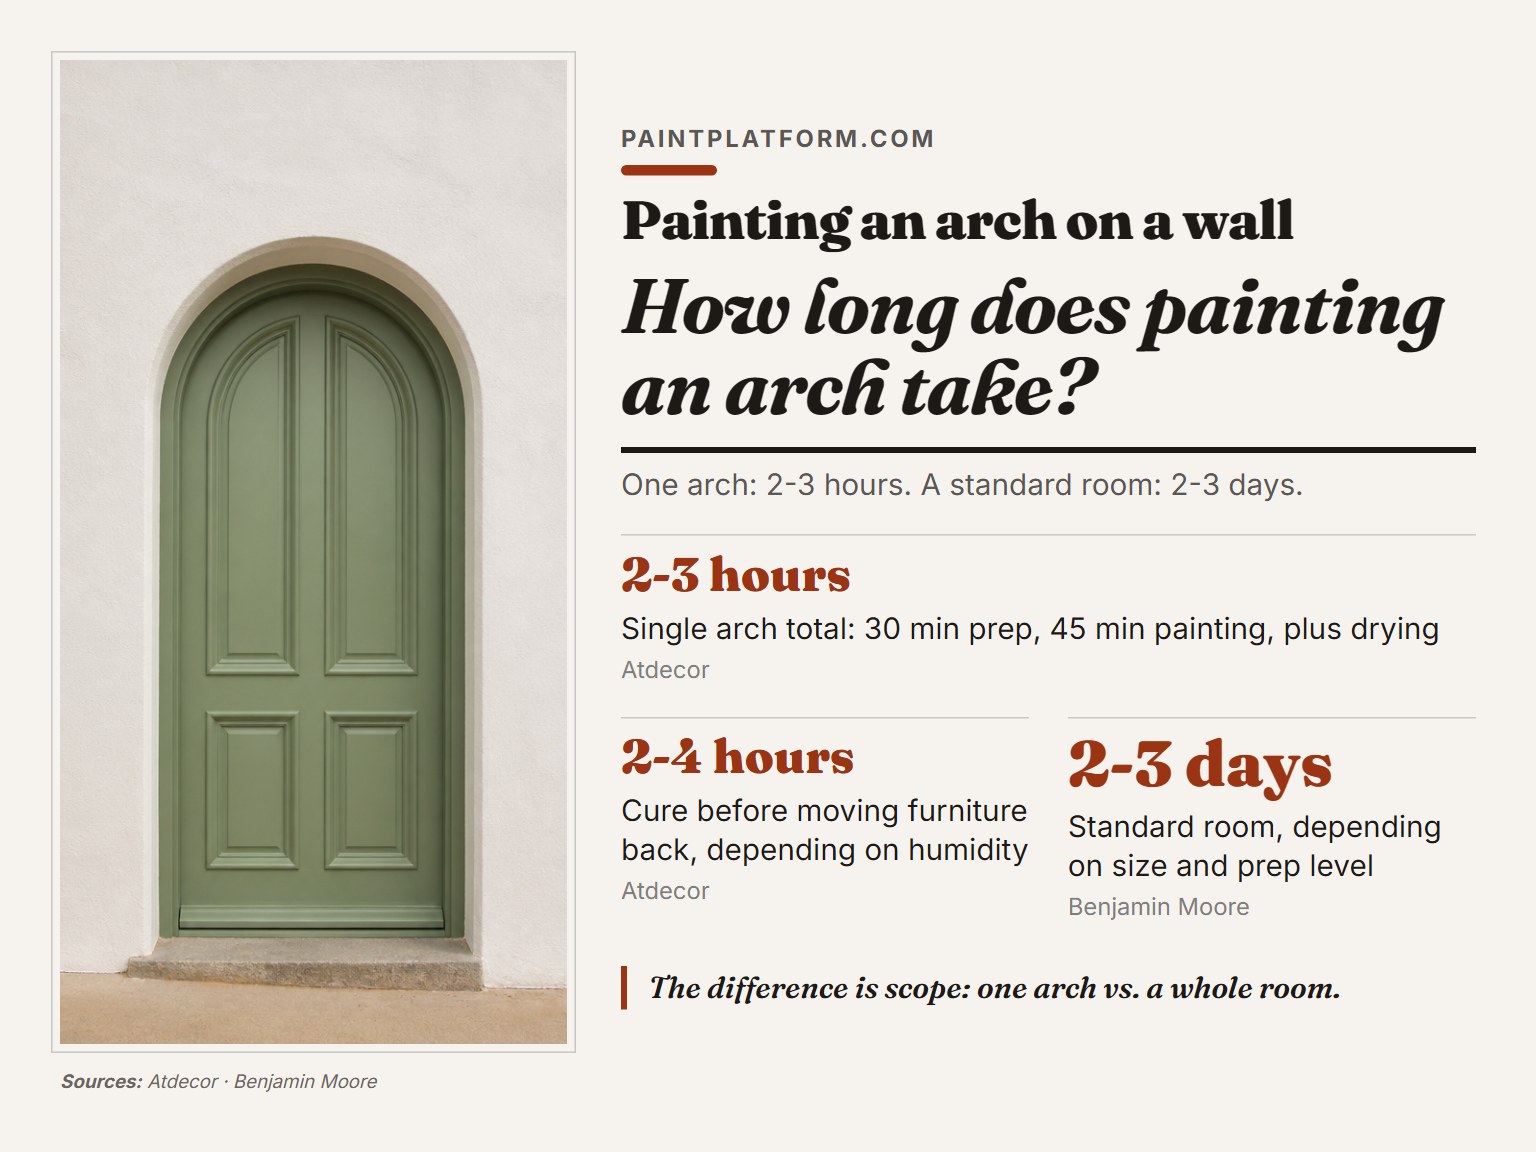
Atdecor says 2 to 3 hours total, with 30 minutes of prep and 45 minutes of painting. Benjamin Moore says a standard room takes two to three days. Both are right for different scopes.
| Source | Scope | Time Estimate |
|---|---|---|
| Atdecor | Single arch | 2-3 hours total (30 min prep, 45 min painting) |
| Atdecor | Cure before moving furniture | 2-4 hours, depending on humidity |
| Benjamin Moore | Standard room | 2-3 days, including drying between coats |
The gap is scope, not disagreement. Atdecor is timing one arch on an already-prepped wall. Benjamin Moore is timing a whole room with multiple coats and drying time between them. If you’re painting one arch, plan for an afternoon. If you’re painting the whole room around it, plan for a weekend.
Order of Operations: Ceiling, Arch, Trim
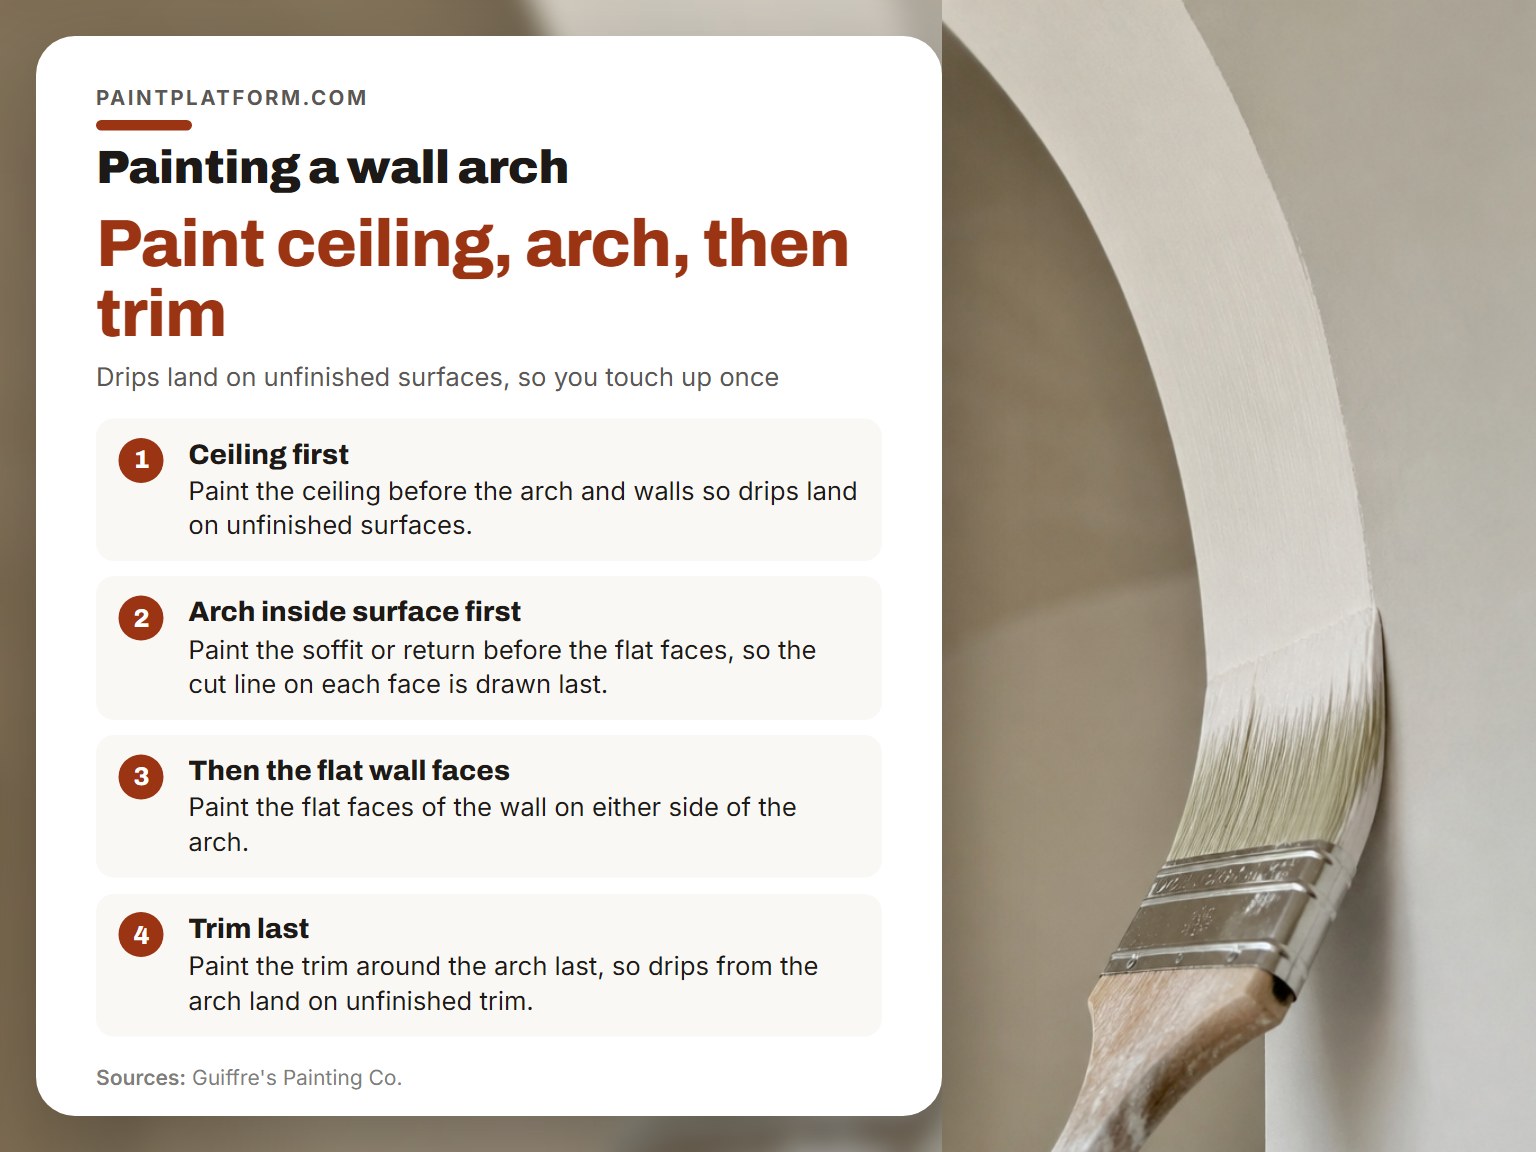
Three things happen in this order: ceiling first, then the arch and walls, then the trim.
Guiffre’s explains why. Drips and brush overlap land on surfaces that aren’t finished yet. If you paint the trim first, every drip from the arch lands on fresh trim and you’re touching up twice.
Within the arch itself, the sequence is:
- Paint the inside surface of the opening (the soffit or return) before the flat faces on either side. Guiffre’s says this way, the cut line on each face is the last thing drawn.
- Paint the flat faces of the wall on either side of the arch.
- Paint the trim around the arch last, so any drips from the arch land on unfinished trim.
For more on the accent-wall side of this, picking the wall, choosing a color, and the deeper-shade trick I keep recommending, the accent wall guide covers the decision before the paint goes on. If you’re breaking the wall into two colors, the two-tone wall guide covers the crisp dividing line. And if you’re planning a second arch or a row of them, the rainbow arch guide covers evenly spaced arcs.
One more decision: the color break. Guiffre’s says the cleanest break is the outside edge where the return turns onto each wall face, not a line partway along the curve. If two rooms are different colors, consider painting the return in the trim color so it doesn’t favor one side.
Frequently Asked Questions
Can you use a roller on an arched doorway?
Small roller can work on the flat parts, but the curved portion is mostly brush work. Guiffre’s says a roller can skip the edge of the curve and leave a texture different from the nearby wall. A careful painter cuts the curve with a brush and blends the roller into it while both are wet.
Why do arches show cracks and gaps so quickly?
Guiffre’s says the joint between trim and curved plaster moves as the house expands and contracts with humidity and heat. Unfilled hairline gaps read as dark lines once painted. Filling them and using a flexible, paintable caulk at the joint helps keep the line clean.
What sheen should I use on curved plaster?
Guiffre’s says match the sheen of the wall the curve belongs to. Typically flat or matte on older plaster because it hides waves. Trim around the arch can carry a higher sheen like satin or semi-gloss. Keeping sheen consistent across a single wall prevents a patched look.
Do I need to prime before painting an arch?
It depends on the surface. Atdecor says to choose paint with primer built in and skip a separate primer step. Benjamin Moore says prime unfinished drywall and unpainted trim, but previously painted walls may not need it. Guiffre’s says prime bare or filled spots regardless, or they flash dull under the finish.
How wide should an arch be?
Atdecor says most arches work well at 30 inches wide, so 15 inches each side of center. On a 9-foot ceiling, start the curve around 6 feet up, following the two-thirds rule.
The Bottom Line
The tape-vs-freehand decision is the whole job. Ace Hardware tapes the curve; Guiffre’s cuts it freehand. The hybrid, tape the straight bottom edges and freehand the curve with an angled sash brush roughly two to two-and-a-half inches wide, is the lowest-risk path for a first arch.
If you’re painting your first arch this week, start smaller than you think. Pick the wall the eye lands on when you walk into the room, not the empty wall. Skip the dramatic dark color from the trend photo. It looks flat once real room lighting hits it. A deeper shade of the existing wall color gives you depth without the contrast shock.
Tape the bottom edges with a level. Cut the curve with a 2-inch angled brush and a steady hand. Roll the flat middle. Pull the tape at 45 degrees while the paint is still wet.
Messy is allowed here. The first arch won’t be perfect, and it doesn’t need to be. Step back and the small imperfections disappear.
